

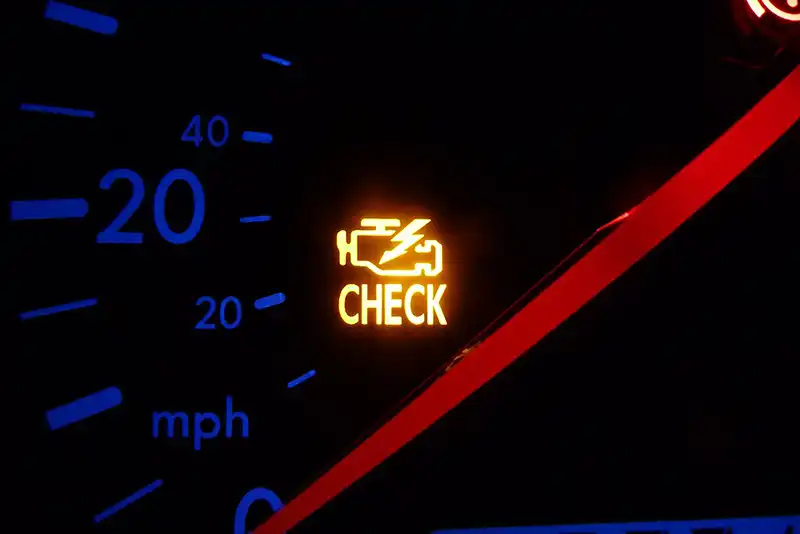
You are cruising down the highway, enjoying your favorite playlist, when suddenly, a small amber light illuminates on your instrument cluster. Your stomach drops. It is the dreaded check engine light. For many drivers, this small glowing icon represents the ultimate automotive mystery—and a source of immediate financial anxiety.
However, panicking is the last thing you need to do. Vehicles today are essentially rolling computers, equipped with dozens of sensors continuously monitoring thousands of data points per second. When that yellow engine block symbol lights up, it is not necessarily a sign of impending doom; rather, it is your vehicle’s early warning system trying to communicate with you.
Understanding what your check engine light is trying to tell you is the key to maintaining your vehicle’s health, extending its lifespan, and saving yourself from hefty repair bills down the road. In this comprehensive guide, we will decode the mysteries of your vehicle’s onboard diagnostic system, explore the most common triggers, explain how to read the signs, and help you determine when it is time for a quick DIY fix versus a trip to a trusted professional.
Dashboard Warning Lights
Modern vehicles feature a wide array of dashboard warning lights, ranging from a simple reminder that your windshield washer fluid is low to critical alerts indicating a loss of oil pressure. These car warning signs are generally color-coded to communicate the severity of the issue:
- Green or Blue Lights: System is on or operating normally (e.g., headlights, cruise control).
- Yellow or Orange Lights: Caution. A system requires attention soon, or a fault has been detected that needs to be checked.
- Red Lights: Stop immediately. Red indicates a severe safety issue or mechanical failure (e.g., engine overheating, loss of brakes, or zero oil pressure).
The check engine light—officially known as the Malfunction Indicator Lamp (MIL)—falls into the yellow/orange category. It signifies that your vehicle’s engine computer has detected a parameter out of its normal operating range, usually related to emissions, fuel mixture, or ignition.
Service Engine Soon vs Check Engine Light
One of the most frequent points of confusion for vehicle owners is the difference between a “Service Engine Soon” light and a “Check Engine” light.
Historically, some manufacturers used these terms interchangeably, but in most modern vehicles, they mean two very different things.
- Service Engine Soon: This is typically a maintenance reminder. It operates on a predetermined schedule based on mileage or time, letting you know that it is time for a routine oil change, filter replacement, or a scheduled milestone inspection.
- Check Engine Light: This is an active alert. It is triggered by the Onboard Diagnostics (OBD) system when a sensor detects an actual malfunction, misfire, or emissions control failure.
Flashing vs Solid Check Engine Light
Not all check engine lights are created equal. The way the light presents itself dictates how you should react.
A Solid Check Engine Light When the light comes on and stays illuminated continuously, the OBD system has recorded a fault. While you shouldn’t ignore it, a solid light rarely means the car will stop running in the next five minutes. It often points to a sensor malfunction, a slight emissions issue, or a loose gas cap. You have time to finish your commute and schedule a diagnostic appointment.
A Flashing Check Engine Light If the light is blinking rhythmically, you have a severe, active problem. A flashing vs solid check engine light signifies a major distinction in urgency. A flashing light almost always indicates a severe engine misfire. When an engine misfires badly, unburned fuel is pushed directly into the exhaust system, where it can quickly overheat and destroy the catalytic converter—a highly expensive repair. Furthermore, it can pose a fire hazard. If your light is flashing, you should safely pull over, turn off the engine, and have the vehicle towed to a repair facility.
Can I Drive With My Engine Light On?
One of the most common questions mechanics hear is, “Can I drive with my engine light on?” The answer depends on the behavior of the light and how the vehicle feels.
If the light is solid yellow and the vehicle is driving perfectly normal with no strange noises, smells, or loss of power, you can generally continue driving to your destination. However, you should prioritize getting it checked within the next few days.
If the light is solid but you are experiencing severe engine performance issues and warning lights alongside it (such as stalling, shaking, or a flashing temperature gauge), you should stop driving. And, as mentioned above, if the check engine light is flashing, do not continue to drive. Continuing to operate a severely malfunctioning vehicle turns a minor, inexpensive sensor replacement into catastrophic engine failure.
Common Reasons for Engine Warning Light Illumination
Now that we understand the urgency levels, let’s explore the actual check engine causes. The onboard computer monitors everything from the air entering the intake to the exhaust leaving the tailpipe. Here are the most frequent culprits.
The Simplest Fix
It sounds too simple to be true, but a surprisingly high percentage of check engine lights are caused by a gas cap that wasn’t tightened properly after refueling.
Modern vehicles utilize an Evaporative Emissions Control System (EVAP). This system traps fuel vapors inside the gas tank and routes them back into the engine to be burned, rather than letting them escape into the atmosphere. The gas cap is a vital seal in this pressurized system.
Loose gas cap symptoms and solutions:
- Symptoms: Aside from the dashboard light, you might notice a faint smell of gasoline around the rear of your car. You will likely not notice any drop in engine performance.
- Solutions: Pull over, remove the gas cap, and put it back on, ensuring it clicks multiple times. If the cap’s rubber O-ring is cracked or degraded, tightening won’t help. In this case, purchasing a cheap replacement cap from an auto parts store is the solution. Note that it may take a few days of driving (or a few start-and-stop cycles) for the light to turn off on its own after you fix the cap.
Symptoms of a Faulty Oxygen Sensor
Your vehicle needs a highly specific ratio of air to fuel to run efficiently (roughly 14.7 parts air to 1 part fuel). The oxygen sensor (O2 sensor) measures the amount of unburned oxygen in your exhaust system to tell the engine computer if the fuel mixture is burning too rich (too much gas) or too lean (too much air).
Over time, these sensors get coated in carbon ash and fail.
Symptoms of a faulty oxygen sensor include:
- A drastic and sudden drop in fuel economy.
- A rough, jittery engine idle.
- A distinct “rotten egg” or sulfur smell coming from the exhaust.
- Dark exhaust smoke.
Ignoring a failing oxygen sensor means your engine is likely burning too much fuel, which will eventually clog and ruin your catalytic converter.
Catalytic Converter Failure Warning Signs
The catalytic converter is an essential emissions control device that transforms harmful exhaust gases (like carbon monoxide) into safe compounds (like water vapor and carbon dioxide) before they leave your tailpipe. It contains precious metals like platinum and palladium, making it one of the most expensive parts on your car to replace.
Catalytic converters rarely fail on their own; they usually die because another problem—like a bad O2 sensor, faulty spark plugs, or an engine misfire—was ignored for too long.
Catalytic converter failure warning signs:
- A severe lack of engine power, especially when trying to accelerate or drive uphill.
- The vehicle refusing to exceed a certain speed.
- The aforementioned “rotten egg” smell.
- Extreme heat coming from the floorboards of the vehicle.
- A rattling noise from underneath the car when idling, indicating the internal honeycomb structure has broken apart.
Spark Plug Replacement Interval and Symptoms
For your engine to produce power, the spark plugs must ignite the air-fuel mixture inside the cylinders at exactly the right millisecond. As spark plugs age, the electrodes wear down, the spark weakens, and the engine begins to misfire.
Spark plug replacement interval and symptoms:
- Interval: Depending on the material (copper, platinum, or iridium), spark plugs should typically be replaced every 30,000 to 100,000 miles. Always check your owner’s manual for your vehicle’s specific intervals.
- Symptoms: If your spark plugs or ignition coils are failing, you will experience hard starts in the morning, a rough idle that makes the steering wheel vibrate, engine hesitation when you press the gas pedal, and a noticeable drop in acceleration power.
Performance and Emissions
A glowing check engine light is not just an aesthetic annoyance on your dashboard; it has real-world implications for how your vehicle drives and its legal status on the road.
Engine Performance Issues and Warning Lights
The engine’s computer relies on data to function. If a Mass Air Flow (MAF) sensor is dirty, it reports the wrong amount of air entering the engine. The computer then delivers the wrong amount of fuel. This direct chain reaction explains why engine performance issues and warning lights go hand-in-hand.
You may experience “limp mode,” a safety feature built into modern cars. When the computer detects a catastrophic sensor failure (like a failing throttle body), it restricts the engine’s RPMs and limits your speed to around 30 mph. This protects the engine from destroying itself while allowing you just enough mobility to limp the vehicle to a repair shop.
Emissions Test Failure Causes
If you live in a state or county that requires annual emissions testing, a check engine light is your worst enemy. In almost all jurisdictions, an illuminated check engine light is an automatic failure, regardless of what the tailpipe emissions actually look like.
Common emissions test failure causes include:
- Evaporative emission (EVAP) system leaks (yes, including that loose gas cap).
- Faulty EGR (Exhaust Gas Recirculation) valves, which help reduce nitrogen oxide emissions.
- Malfunctioning oxygen sensors.
- Catalytic converter inefficiency.
Furthermore, you cannot simply clear the codes in the auto parts store parking lot right before your inspection. When codes are cleared, the vehicle’s internal “Readiness Monitors” are reset. The emissions testing machine will see that the monitors are not ready, resulting in an automatic rejection until you drive the car enough to reset them—at which point the check engine light will likely turn back on if the root problem hasn’t been fixed.
Diagnosis: Finding the Root Cause
So, the light is on, and you’ve checked your gas cap. What is the next step? It is time to communicate with the vehicle’s computer.
How Your Car Communicates
Since 1996, every car sold in the United States has been mandated to use a universal diagnostic system known as OBD-II (Onboard Diagnostics, generation 2). This system standardizes the port used to read data and the formatting of the error codes across all makes and models.
How to Use OBD2 Scanner
Reading the code that triggered your engine light is easier than you might think. Many drivers purchase inexpensive DIY scanners or use a Bluetooth dongle that connects to a smartphone app.
Step-by-step guide on how to use OBD2 scanner:
- Locate the OBD-II Port: In most vehicles, this 16-pin trapezoid-shaped connector is located underneath the driver’s side dashboard, somewhere between the steering column and the pedals.
- Plug in the Scanner: Ensure the vehicle is turned off. Push the scanner plug into the port firmly.
- Turn the Key: Turn the ignition key to the “On” position without actually starting the engine. If your car has a push-button start, press the start button twice without putting your foot on the brake.
- Read the Codes: Follow the prompts on the scanner’s screen. Select “Read Codes.” The scanner will query the computer and display a five-character code (or multiple codes if there are several issues).
- Record the Data: Write down the codes exactly as they appear.
A Brief OBD-II Diagnostic Trouble Codes List
The codes generated by the scanner are alphanumeric. They begin with a letter (usually ‘P’ for Powertrain) followed by four numbers. While there are thousands of specific codes, they are organized into categories.
Here is a brief OBD-II diagnostic trouble codes list for context:
- P0100 – P0199: Fuel and Air Metering (e.g., P0171 means the engine is running too lean).
- P0200 – P0299: Fuel Injector Circuit issues.
- P0300 – P0399: Ignition System or Misfires (e.g., P0300 is a random multiple cylinder misfire; P0301 is a misfire specifically in cylinder 1).
- P0400 – P0499: Auxiliary Emissions Controls (e.g., P0420 indicates catalytic converter system efficiency is below the threshold; P0442 indicates a small EVAP system leak).
- P0500 – P0599: Vehicle Speed Controls and Idle Control System.
- P0700 – P0899: Transmission controls.
Professional Diagnostic vs DIY Code Reading
There is a massive misconception in the automotive world that an OBD-II scanner tells you exactly what part to replace. This is simply not true.
A scanner reads symptoms, not solutions.
Let’s examine the professional diagnostic vs DIY code reading debate. Suppose your DIY scanner gives you a code “P0171 – System Too Lean (Bank 1).”
- The DIY Approach: A novice might google the code, see that an oxygen sensor measures fuel mixtures, and spend $150 replacing the oxygen sensor. They turn the car on, and the light comes back.
- The Professional Approach: A certified mechanic understands that “System Too Lean” means too much air is entering the engine. They use advanced diagnostic tools (like smoke machines) and look at live data streams. They might discover that a $5 rubber vacuum hose has a crack in it, letting unmetered air into the intake manifold. The O2 sensor was working perfectly—it was just doing its job by reporting the problem.
DIY code reading is a fantastic tool to gauge the severity of an issue, but it takes professional experience, electrical testing equipment, and advanced scan tools to pinpoint the actual mechanical failure without throwing expensive parts at a guess.
Cost to Diagnose Check Engine Light
When you take your vehicle to a repair shop, you will typically be charged a diagnostic fee. Vehicle owners sometimes balk at this, wondering why they must pay to find out what is wrong.
The cost to diagnose check engine light issues generally covers one to two hours of a master technician’s time. This fee pays for the use of multi-thousand-dollar diagnostic equipment, access to proprietary software, electrical pinpoint testing, and physical inspections of the engine bay.
Usually, the diagnostic fee runs between $100 and $200, depending on the shop and your geographic location. Many reputable shops will roll a portion of this diagnostic fee into the cost of the final repair if you choose to have the work done at their facility. Paying for a proper diagnosis saves you money by ensuring only the broken part is repaired.
Resolution and Moving Forward
Once the root cause of your warning light has been identified and the repair has been performed, the final step is getting the vehicle’s computer back to a neutral state.
How to Reset Check Engine Light After Repair
If you have performed a repair at home, you might be wondering how to reset check engine light after repair work is completed.
The Right Way: The safest and most accurate way to reset the light is by using an OBD-II scanner. Once connected, navigate to the “Erase/Clear Codes” menu option. The scanner will prompt you to confirm. Once cleared, you will need to drive the vehicle through a “drive cycle” (a mix of highway and city driving over a few days) so the computer can run its self-checks and confirm the issue is truly resolved.
The Wrong Way: Decades ago, people would simply disconnect the negative battery cable for 15 minutes to reset the engine computer. In modern cars, this is highly discouraged. Not only does it wipe out the readiness monitors for emissions testing, but it also erases the engine’s “learned” memory for idle speed and transmission shift points. It can also lock up modern infotainment systems and anti-theft radios, creating more headaches than it solves. Always use a scanner to clear a code.
When to Call the Professionals
While replacing a gas cap or swapping out an easy-to-reach spark plug might be within the wheelhouse of a weekend DIY warrior, the vast majority of check engine causes require professional attention. From complex wiring shorts and software updates to heavy mechanical failures and catalytic converter replacements, modern vehicles require specialized expertise.
If you are dealing with persistent engine performance issues, flashing dash lights, or an emissions failure, it is imperative to trust your vehicle to experts who prioritize transparency and accuracy.
When it’s time to get to the bottom of your vehicle’s issues, Choose NW Houston Auto Repair and Collision. Their team of highly certified technicians uses state-of-the-art diagnostic equipment to stop the guesswork and get you back on the road safely and efficiently. You don’t have to navigate the stress of dashboard warning lights alone. To learn more about how they pinpoint complex engine problems without unnecessary part swapping, visit https://nwhoustonautorepair.com/services/car-diagnostics/.
Listen to Your Car
Knowing what your check engine light is trying to tell you changes the entire narrative of car ownership. Instead of viewing that little amber icon with dread and anxiety, you can view it for what it is: a helpful alert designed to keep small problems from turning into catastrophic failures.
Whether the culprit is a loose gas cap, an aging oxygen sensor, or a cylinder misfire, prompt attention is always your best defense. By understanding the common reasons for engine warning light illumination, recognizing the difference between a solid and flashing alert, and knowing when to rely on professional diagnostics, you empower yourself to make smart, cost-effective decisions about your vehicle’s maintenance.
The next time your dashboard lights up, don’t panic, and don’t reach for black electrical tape to cover it up. Read the signs, take the appropriate action, and let the professionals help keep your engine running smoothly for years to come.
NW Houston Auto Repair and Collision
1608 W 22nd St
Houston, TX 77008-1504
281-607-0753
View our Google Listing